How to create REST API using Django REST framework
And how to host it on Render.com
Let me introduce you to Steve, a banana farmer who cultivates a diverse range of bananas, from Apple bananas to Lady Fingers bananas. And steve love's his bananas and wants to sell them to the online market. Let's say he already has a website to list your bananas on. As of now static you have stock available hardcore written to HTML file. Every time he wants to update you have to edit the HTML file which is sad🤕. He finally decide to make the website dynamic by creating an API to get stock information from the database.

He takes his Banana Book laptop and starts coding. He chooses Django paired with the Django REST framework as we want to make the banana website robust. But he gets get stuck and couldn't figure out what to do next. He reaches burnout and feels like he cannot do it. Then he remembers his bananas and his love for bananas gave him more determination. He remembers an old friend Akash😎, who can help him to complete this task. So he asks the guy and that guy writes a tutorial for him.
Let's help Steve to make a REST API using the Django REST framework.
Let's help Steve
Steve is a great guy and his love for bananas is immeasurable, so let's help Steve by building him a REST API using the Django REST framework. Firstly we require a laptop that has Python3 installed on it. You can download it from Python.org. Different versions of Python are available but be careful and choose any version >= 3.8.
We will be building a Rest API to fetch banana stocks from the database. Let's not connect the database, it may get confusing to call it in one tutorial. Here instead we can use a JSON file which stores data and parse it to get the values of the stock. We are trying to learn how to use the Django rest framework and create a REST API using it. So we won't be learning much about database connection here.
Setting up Django
It's better to use a dedicated environment for each Django project. Even Django team suggests using a virtual environment. Python itself comes with venv for managing environments which we will use for this guide.
Setting up environment
You can give any name to the virtual environment, but here I am going with djangoproject.
Windows
Make sure you have installed Python before continuing to the next instructions.
Next, create a folder in your preferred directory and name it whatever you like I am going with Django REST API framework. Next to set up the virtual environment enter the command opening terminal or CMD.
py -3 -m venv djangoproject
.venv\scripts\activate
Linux or Mac OS
Most of the Linux Distributions come with python3 installed by default, just check if it exists by using the command.
python3 --version
For Mac users just head to python.org and download the .pkg file and start installing.
Next to setting up a virtual environment, on Linux sometimes we need to install the extra library. To do the same, just enter the command in your terminal.
sudo apt-get install python3-venv
Next, to initialize and activate a virtual environment on Mac and Linux, use the commands below.
python3 -m venv djangoproject
source .venv/bin/activate
Installing Django
Next, we need to install Django on our virtual environment. To do that we can simply use the command below. Make sure you have activated the virtual environment before executing this command.
pip install Django
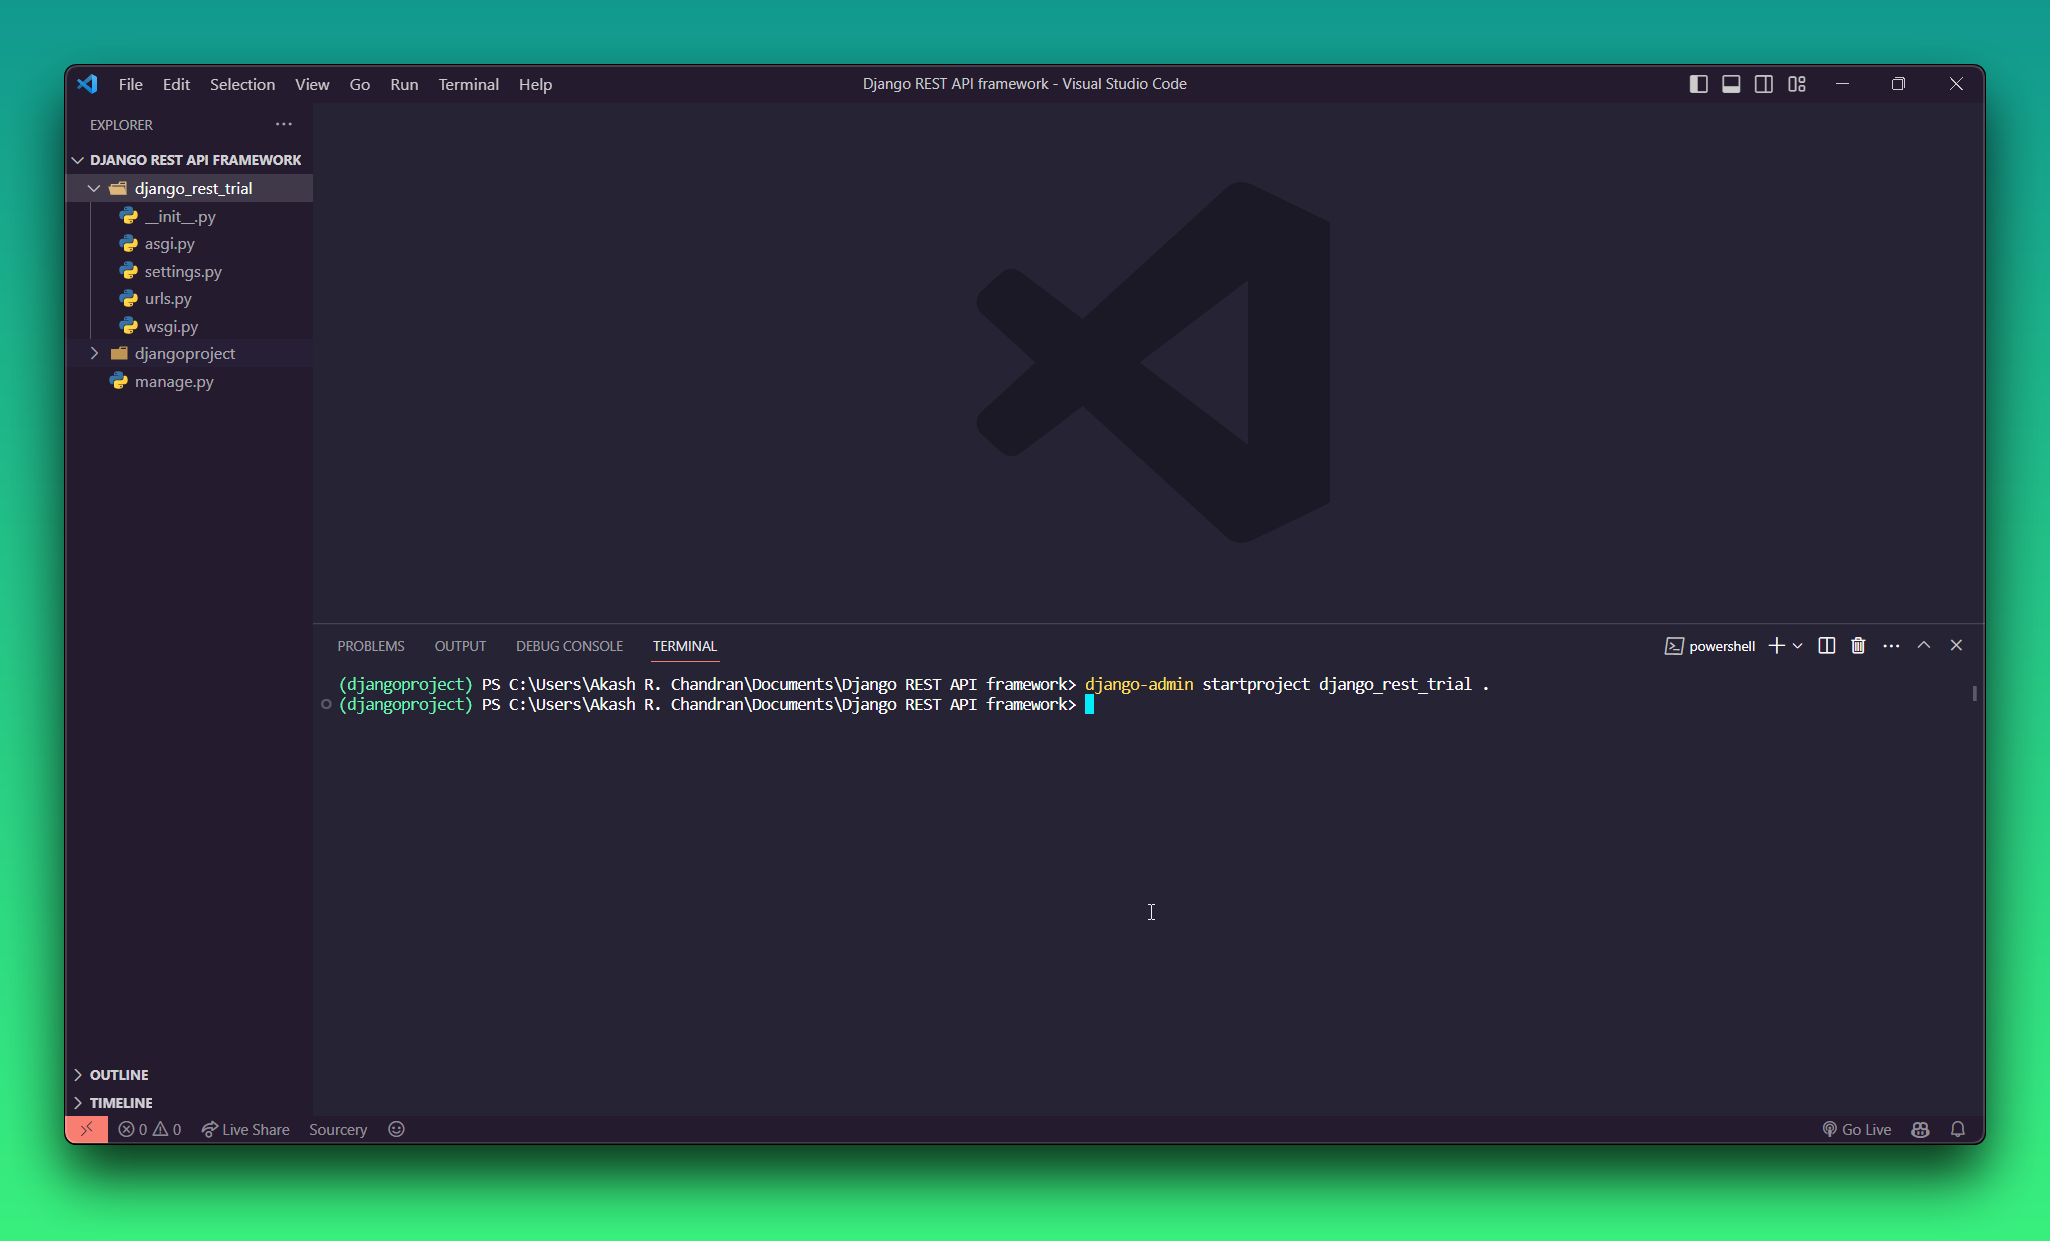
After that, we have to start a project in our directory to get started. Django provides a template for the project and we can use that to create our app. To get the template in our current working directory you can use the command below.
django-admin startproject django_rest_trial .
django_rest_trial is the name of the project which I choose, but you're free to use whatever name you prefer. After running that some files and folders should appear on the file explorer.
Now we need to create an app inside our Django project. The apps are like parts of a website which manage a certain task. for example, we can have an app for handling payment on the website or we can have an app that verifies login and sign-up. This is one of the pros of using Django as different teams can manage different apps yet they can make them work together.
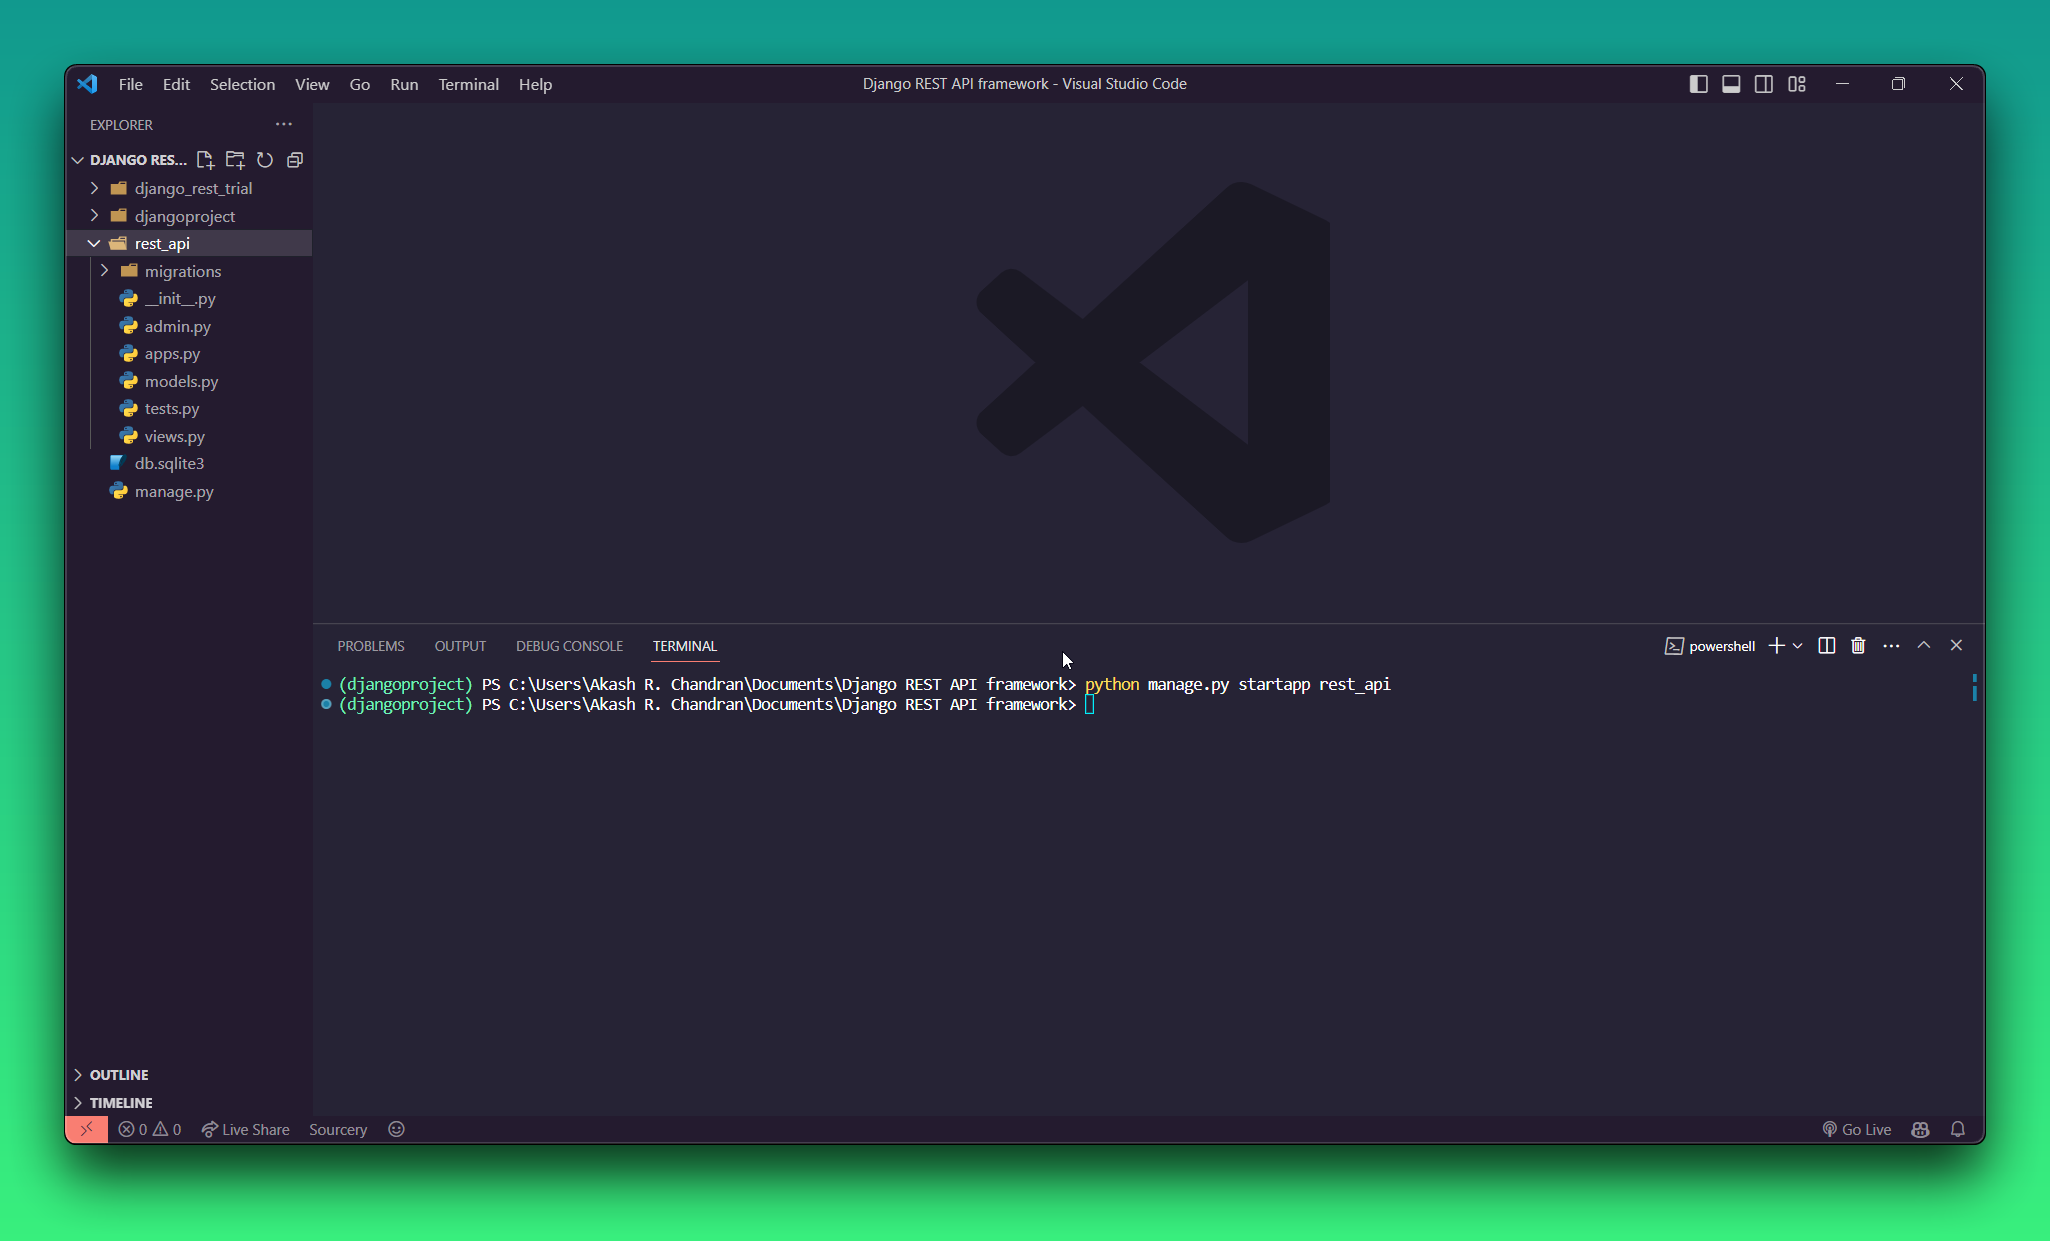
To create a Django app you can use the below command. Here rest_api is my app name as it manages the REST APIs on our website. Feel free to choose a different name if you want to.
py manage.py startapp rest_api #windows

python3 manage.py startapp rest_api # Linux and MAc
After executing this command a new folder should appear with the name of the app that was created using the above command.
Even though we don't require a database, Django sessions and other values like admin, users etc. need a database. By default, Django comes with SQLite, which is a great option as it doesn't need much of any configuration. Django needs to migrate the required tables and values to the database to do that we have to use the below command.
py manage.py migrate # Windows

python manage.py migrate # Linux
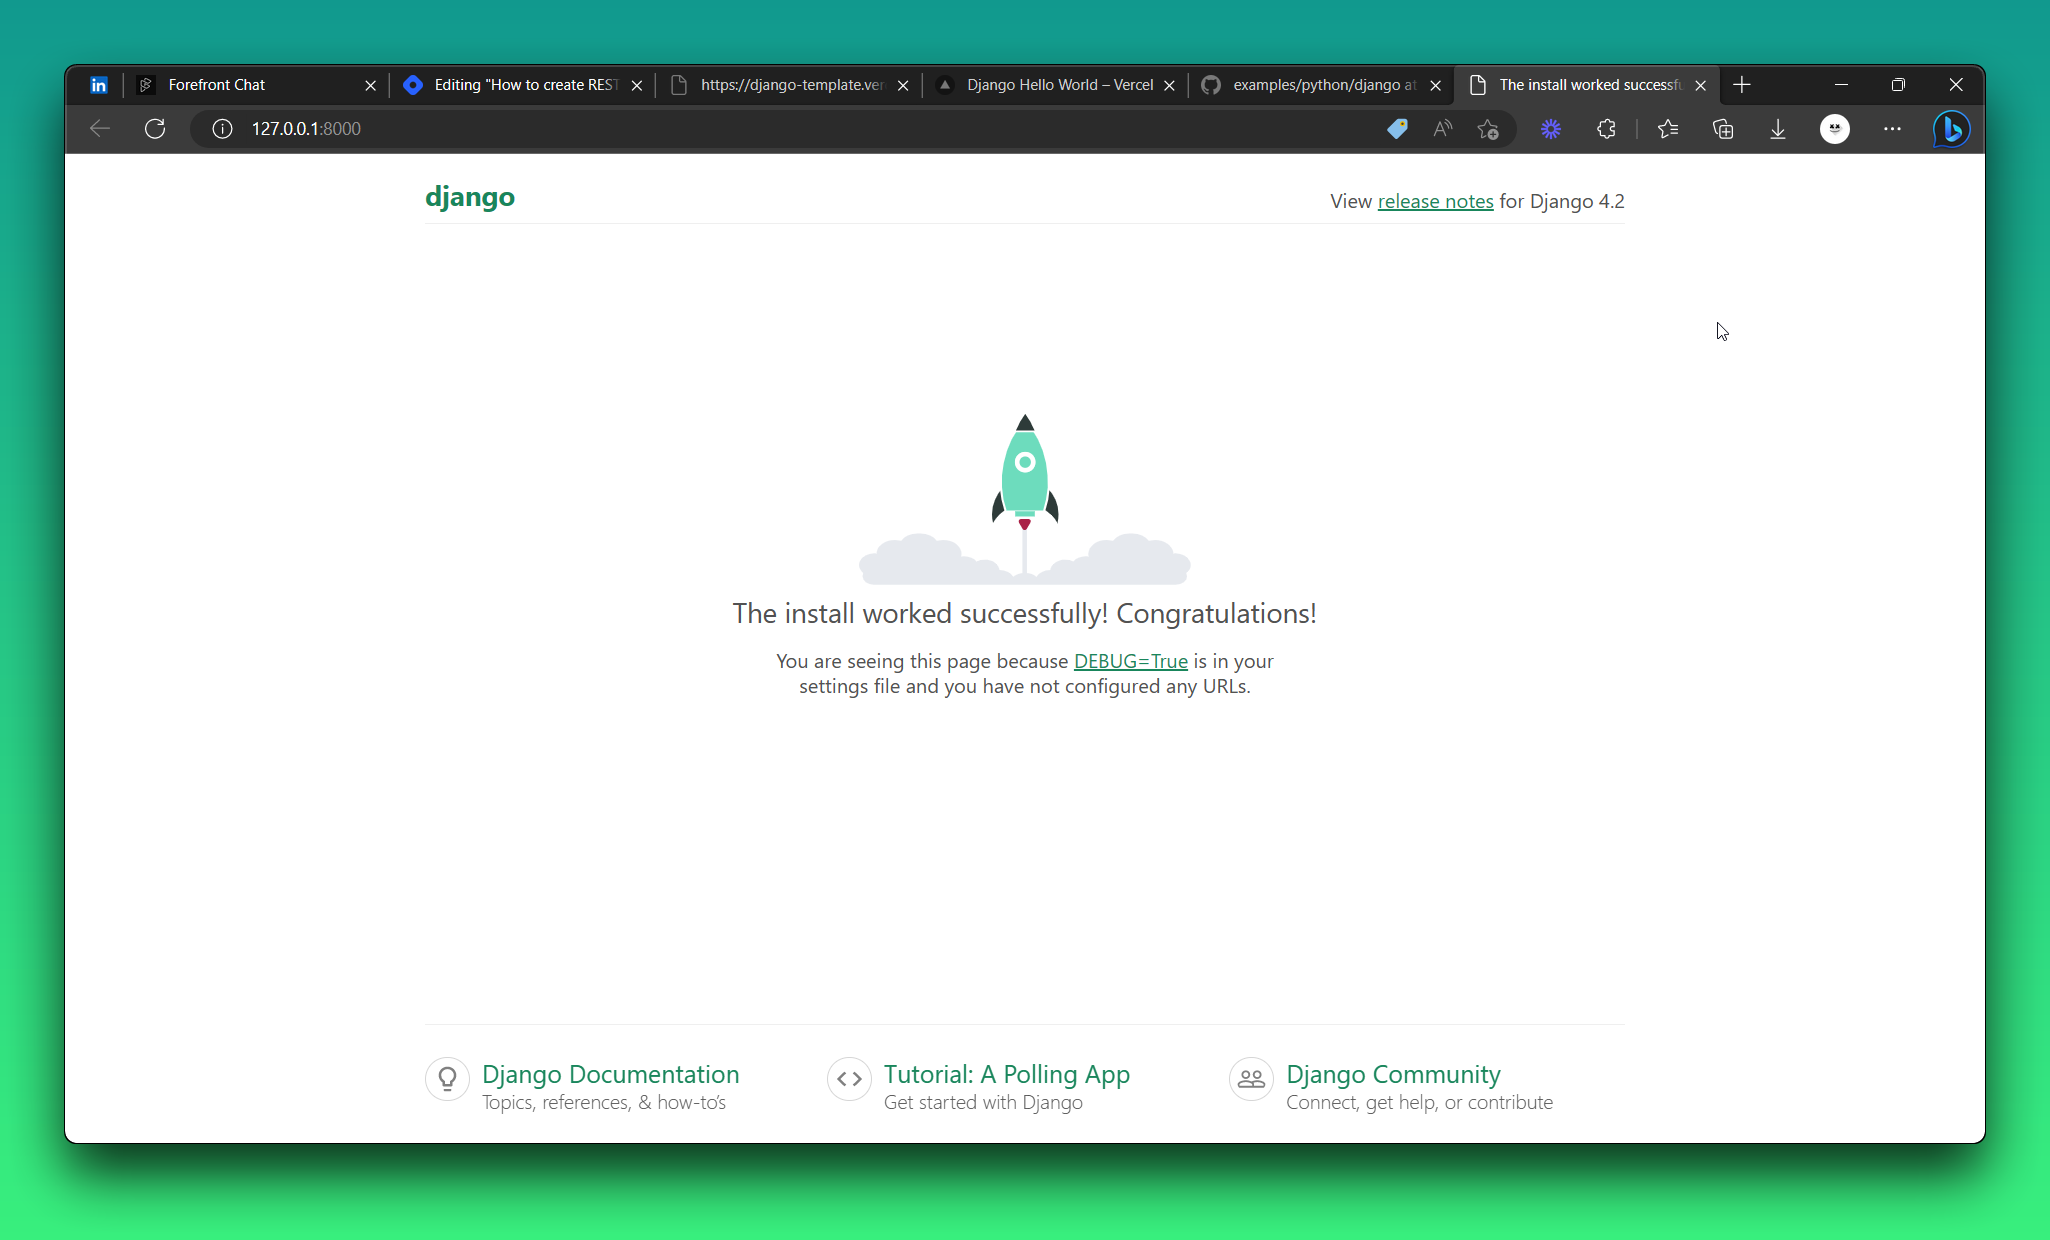
We have finished setting up our Django project, you can even try running it by just running the server using the runserver command. Go to http://127.0.0.1:8000/ and you should see the standard Django greeting page.
py manage.py runserver # Windows

python3 manage.py runserver # Linux
Setting up the Django REST framework
Next, we have to install the Django REST framework, to do the same we can use pip. To install it use the command below:
pip install djangorestframework
Then we need to edit the settings.py of our Django project and include rest_framework in our project. You can find the settings file inside the main project folder which is the django_rest_trial for me.

And that's it we have completed the setup of the Django REST framework. We also need to install whitenoise which helps in simplifying static file serving for Python web apps. You may think that we don't have any static files for our API, but Django has it for the admin panel, debug panel etc.
pip install whitenoise[brotli]
You have to set up whitenoise as well, to do that you have to add whitenoise to your middleware in the setting.py file.
MIDDLEWARE = [
    'django.middleware.security.SecurityMiddleware',
    'whitenoise.middleware.WhiteNoiseMiddleware', #Added
    'django.contrib.sessions.middleware.SessionMiddleware',
    ...
]
You need also setup static files root to that copy and paste the below line after STATIC_URL variable. And add the lines below
if not DEBUG:
    STATIC_ROOT = os.path.join(BASE_DIR, 'staticfiles')
    STATICFILES_STORAGE = 'whitenoise.storage.CompressedManifestStaticFilesStorage'
Let's start coding
First of all, we need to get the JSON file on which we are going to store the data on. I will provide it below, just copy and paste it into a file named database.json and keep it the in the root folder with the manage.py file.
{
  "bananaTypes": ["Apple Banana", "Cavendish", "Lady Finger", "Red Dacca"],
  "availableStock": [100, 200, 300, 400]
}
Next, we need to configure routes or endpoints which our REST APIs will use. Let the rest_api app uses the route /rest/. That is over API endpoints will be starting with the rest keyword.
To configure this we need to create urls.py file in the rest_api app folder. Keeping it aside we will need it later, open the main project folder and open the urls.py file inside it and add the following element to the urlpatterns list. You may need to import the include function from the django.urls. Finally, the file would look like this,
from django.contrib import admin
from django.urls import include, path # include was also imported

urlpatterns = [
    path('admin/', admin.site.urls),
    path('rest/', include('rest_api.urls')), # added
]
Next, we will start coding the main part of the project. Open the views.py file in the app folder and continue the part.
Coding the main part
Let's start by creating a function that reads our database which is the database.json file. I need to parse JSON so we import json library also. And create a read_database() function. which somewhat looks like,
import json

def read_database():
    with open('database.json', 'r') as f:
        return json.load(f)
After that, we create a function which accepts both GET and POST request and respond with the available stock of each banana variety. To do that we need to import app_view and Response from Django REST framework.
The app_view is a decorator which is used to denote what type of requests it can accept in our case we accept both GET and POST requests. It almost acts the same way as the app.route in Flask, we mention methods in the same if you know.
The Response object allows you to easily serialize data into the appropriate format (such as JSON or XML) and set the appropriate HTTP status code for the response. It also provides several convenient methods for setting headers, cookies, and other response metadata.
The views.py file would be like after all changes,
import json

from rest_framework.decorators import api_view
from rest_framework.response import Response

def read_database():
    with open('daabase.json', 'r') as f:
        return json.load(f)

@api_view(['GET', 'POST'])
def get_stocks(request):
    try:
        database = read_database()
        banana_type = database['bananaTypes']
        avail_stock = database['availableStock']
        response = {}
        for banana,stock in zip(banana_type,avail_stock):
            response[banana] = stock
        return Response({'error':False, 'bananaStock': response}, status=200)
    except Exception as e:
        return Response({'error':True, 'message': str(e)}, status=500)
If you remember we have to still route the function get_stocks to one of the endpoints. To do that open the urls.py in the rest_api or app folder and paste the below code,
from django.urls import path
from . import views


urlpatterns = [
    path('get_stock/', views.get_stocks, name='available stocks'),
]
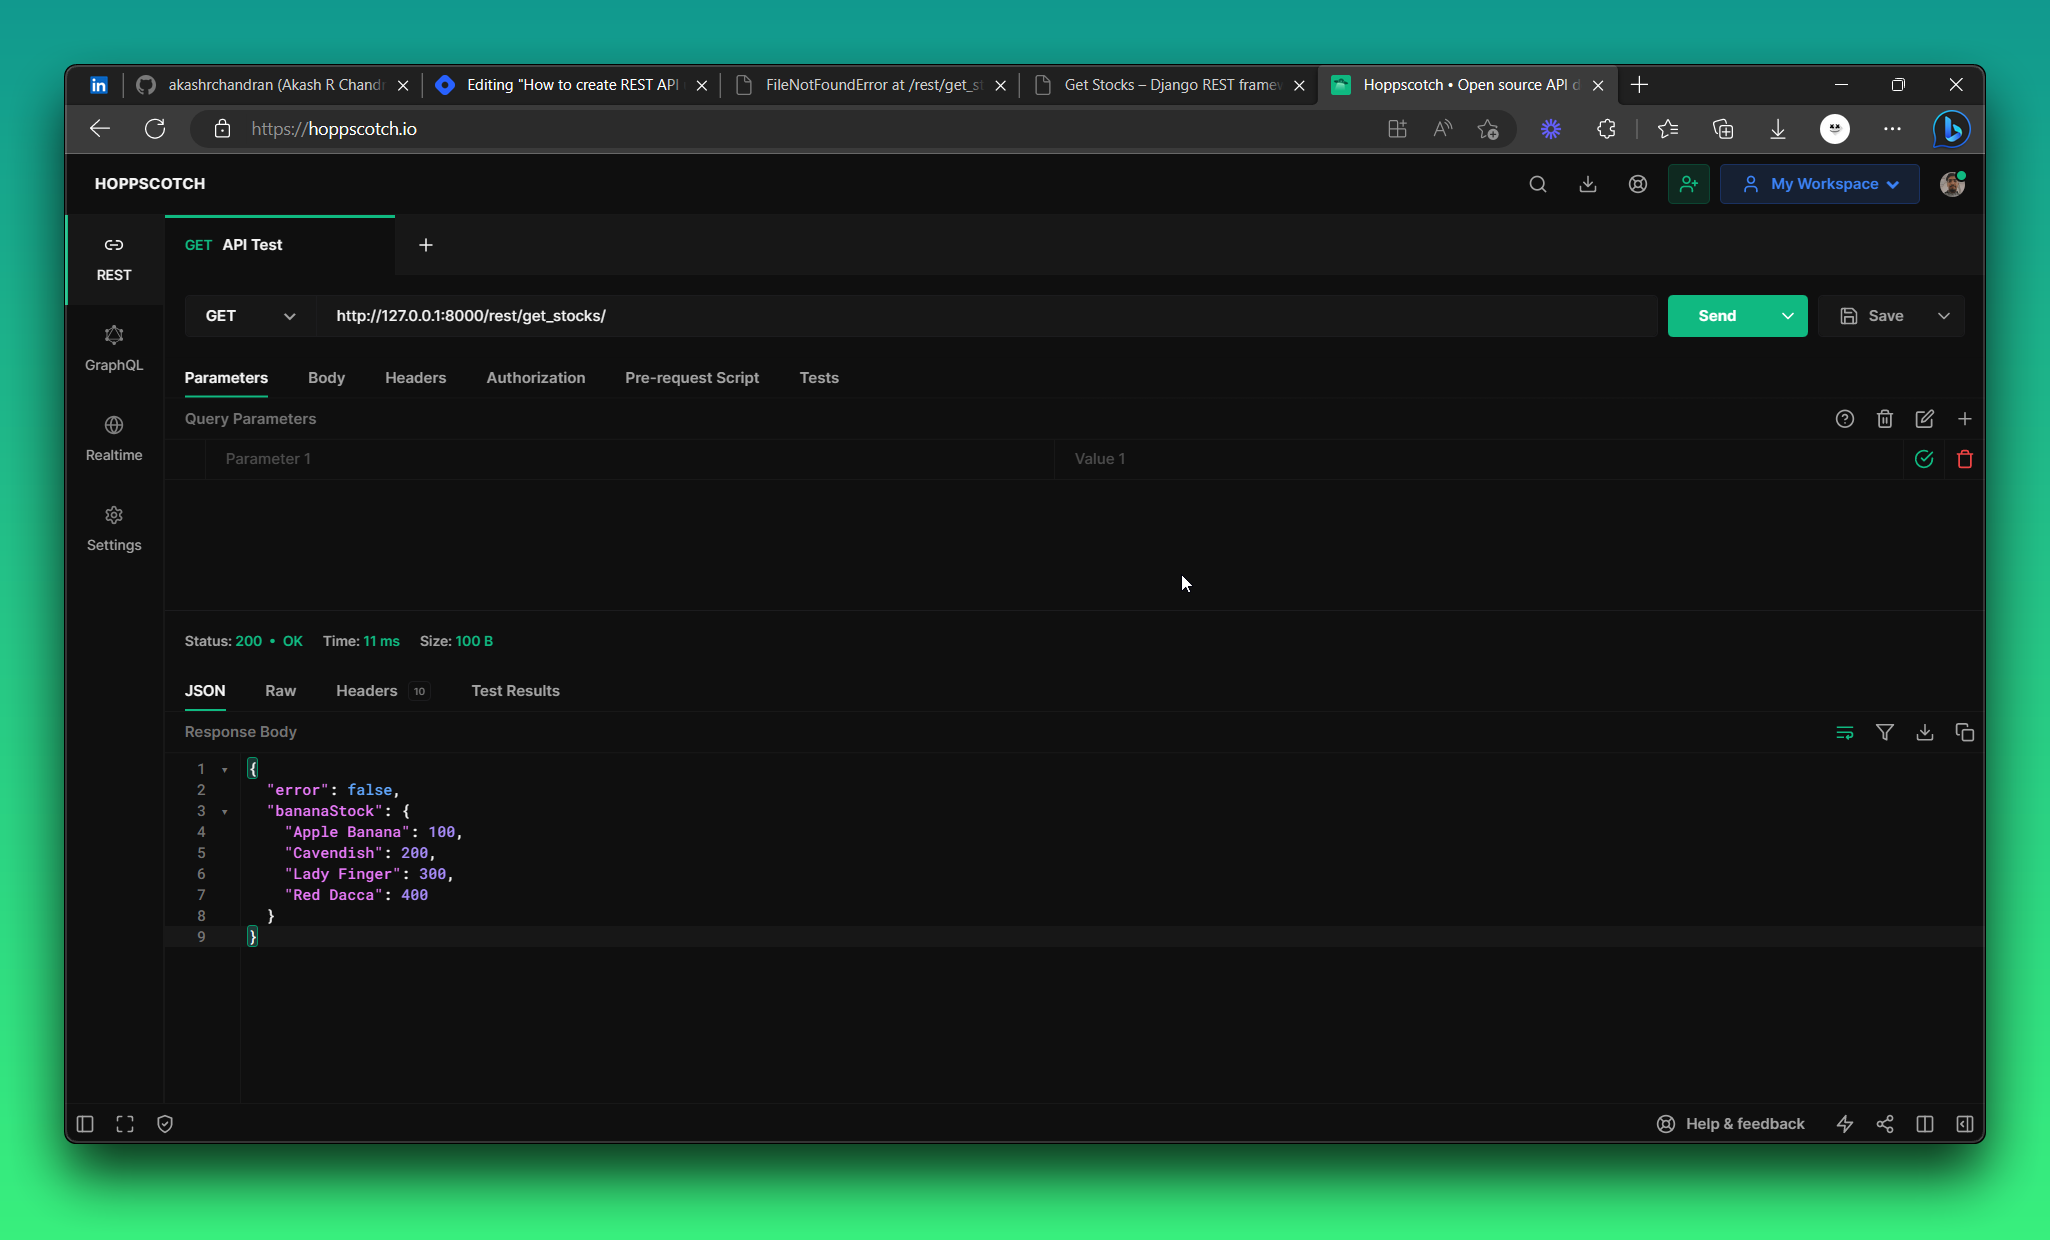
Now our Django REST API is successfully created. You can try running it on localhost by using the command python manage.py runserver and heading to http://127.0.0.1:8000/rest/get_stocks/ to see the API working in real-time.
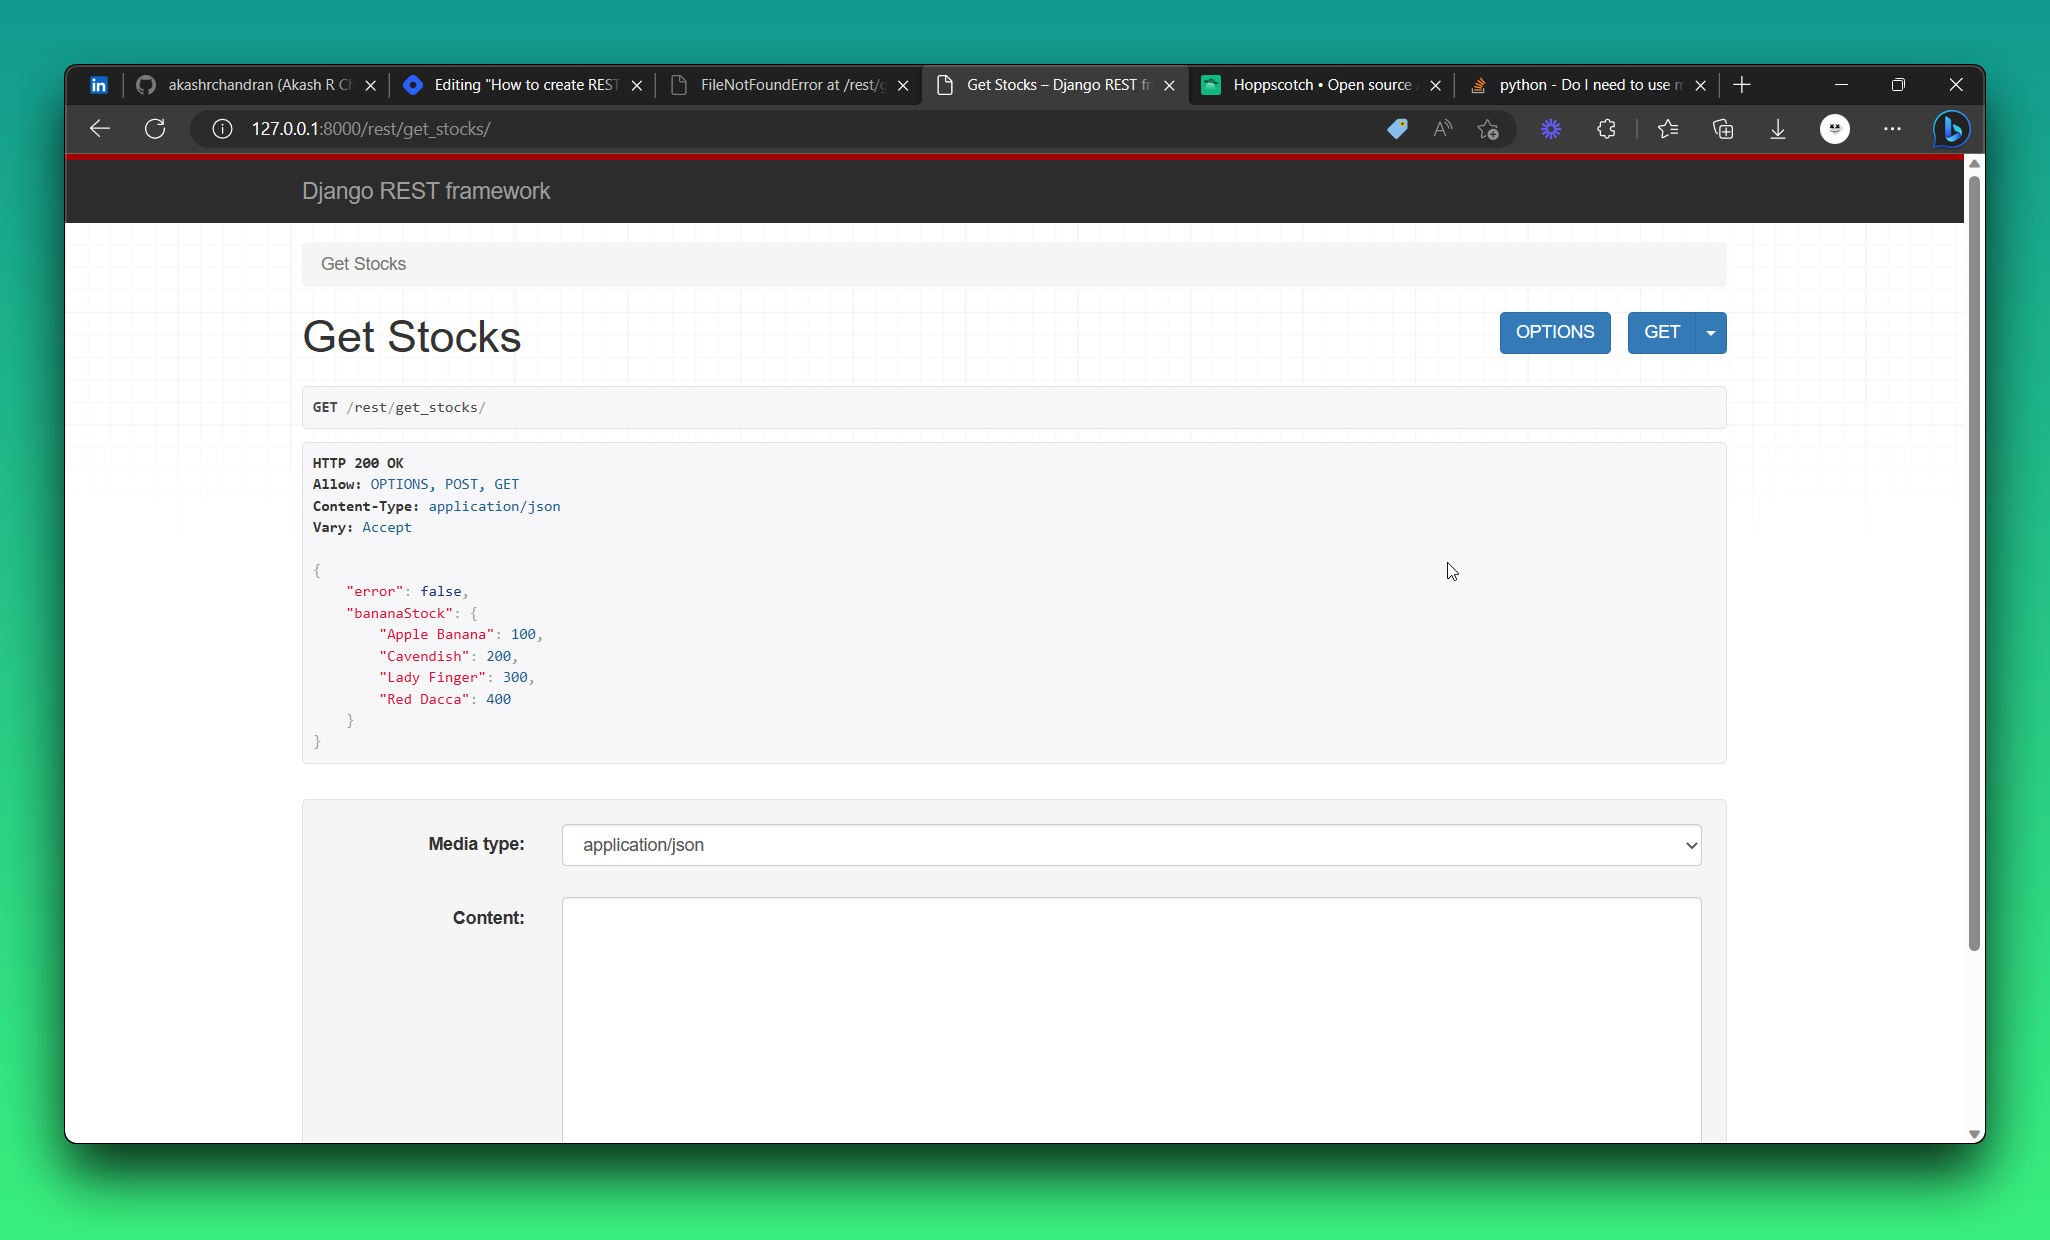
You can even use Postman or Hoppscotch to test the API to check if it's working correctly.
Hosting API on render.com
You need an account on render.com. You can signup for one here. And connect your GitHub account to it. You can find all the instructions in detail on my old blog, I will link it below
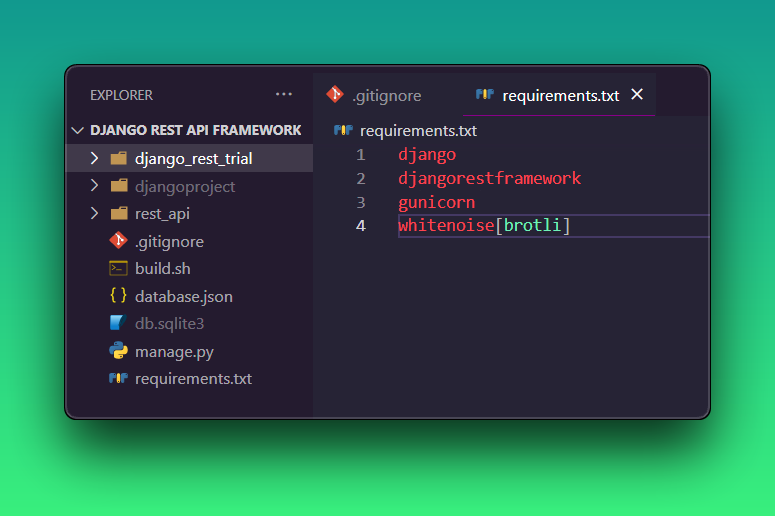
Creating Requirements.txt
Usually, I use external library pipreqs, but you can just simply type django, djangorestframework, gunicorn and whitenoise[brotli] in the requirements.txt file. When deploying, render will install the latest version of these modules.
Creating a .gitignore file
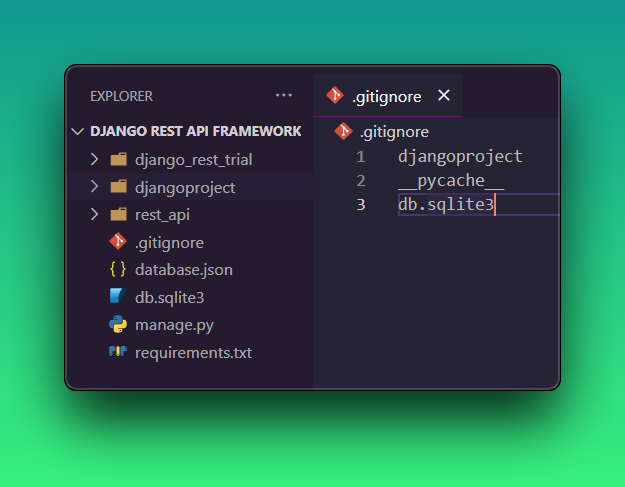
.gitignore file helps to avoid uploading unwanted or private files to the git clients such as GitHub or GitLab. When sharing your code with others, there are often files or parts of your project, you do not want to share. So these files or folders can be mentioned in the .gitignore file.
For this Django project, we don't want to upload djangoproject, __pycache__ and db.sqlite3to GitHub. So we mention them in the .gitignore file like this.
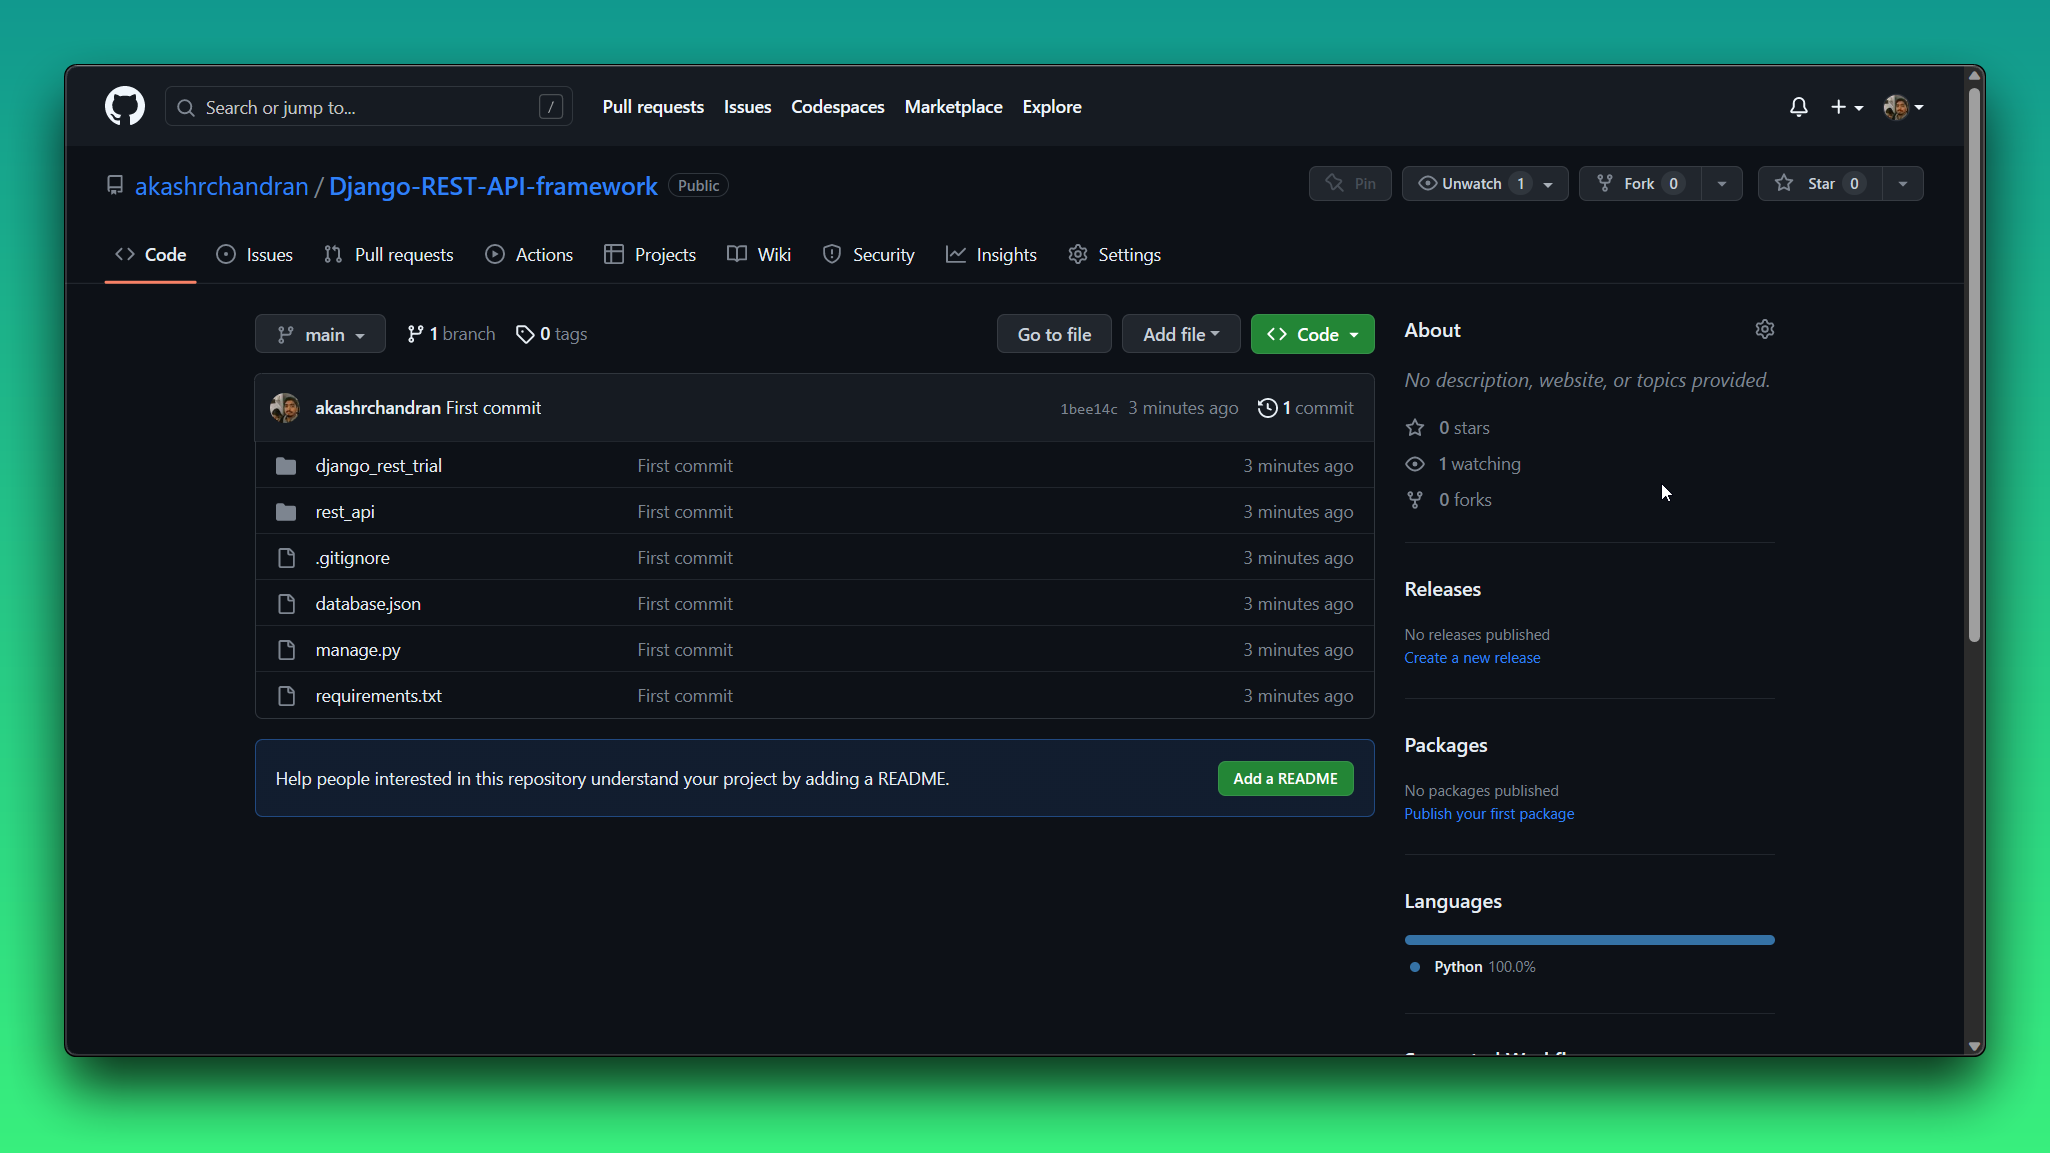
Upload to GitHub or GitLab
I am using GitHub here, but you can use GitLab as well. I have installed git, and I have connected it to my GitHub account. You'll find many articles on how to do it, just google it. If you're using Visual Studio then it has an built GitHub plugin which makes it way easier. I have successfully uploaded it to GitHub, you can find mine at akashrchandran/Django-REST-API-framework.
Make the app production ready
We will need to change some parts of the settings of Django to make it production ready.
Find the declaration of the SECRET_KEY setting by opening settings.py. We don't want to keep production secrets in source code, so we'll get them via an environment variable we'll set later:
# Add this to begining of the file
import os
Next change SECRET_KEY to be equal to the environmental variable we are going to provide later.
SECRET_KEY = os.environ.get('SECRET_KEY', default='thisisahugesecret')
Also, change DEBUG to dynamically change based on environment variables
DEBUG = 'RENDER' not in os.environ
We need to change allowed hosts also, as we are hosting. Rather than directly giving the host id after deployment we can also make it dynamic
# https://docs.djangoproject.com/en/3.0/ref/settings/#allowed-hosts
ALLOWED_HOSTS = []

RENDER_EXTERNAL_HOSTNAME = os.environ.get('RENDER_EXTERNAL_HOSTNAME')
if RENDER_EXTERNAL_HOSTNAME:
    ALLOWED_HOSTS.append(RENDER_EXTERNAL_HOSTNAME)
And we are done our project is now production ready. Now let's push changes to GitHub and continue.
Create a Build Script
We need to run a series of commands to build our app. We can accomplish this with a build script. Create a script called build.sh at the root of your repository:
#!/usr/bin/env bash
# exit on error
set -o errexit

pip install -r requirements.txt

python manage.py collectstatic --no-input
python manage.py migrate
Make sure the script is executable before checking it into Git:
chmod a+x build.sh
We completed the build script as well, and now push it to GitHub.
Deploying to Render.com
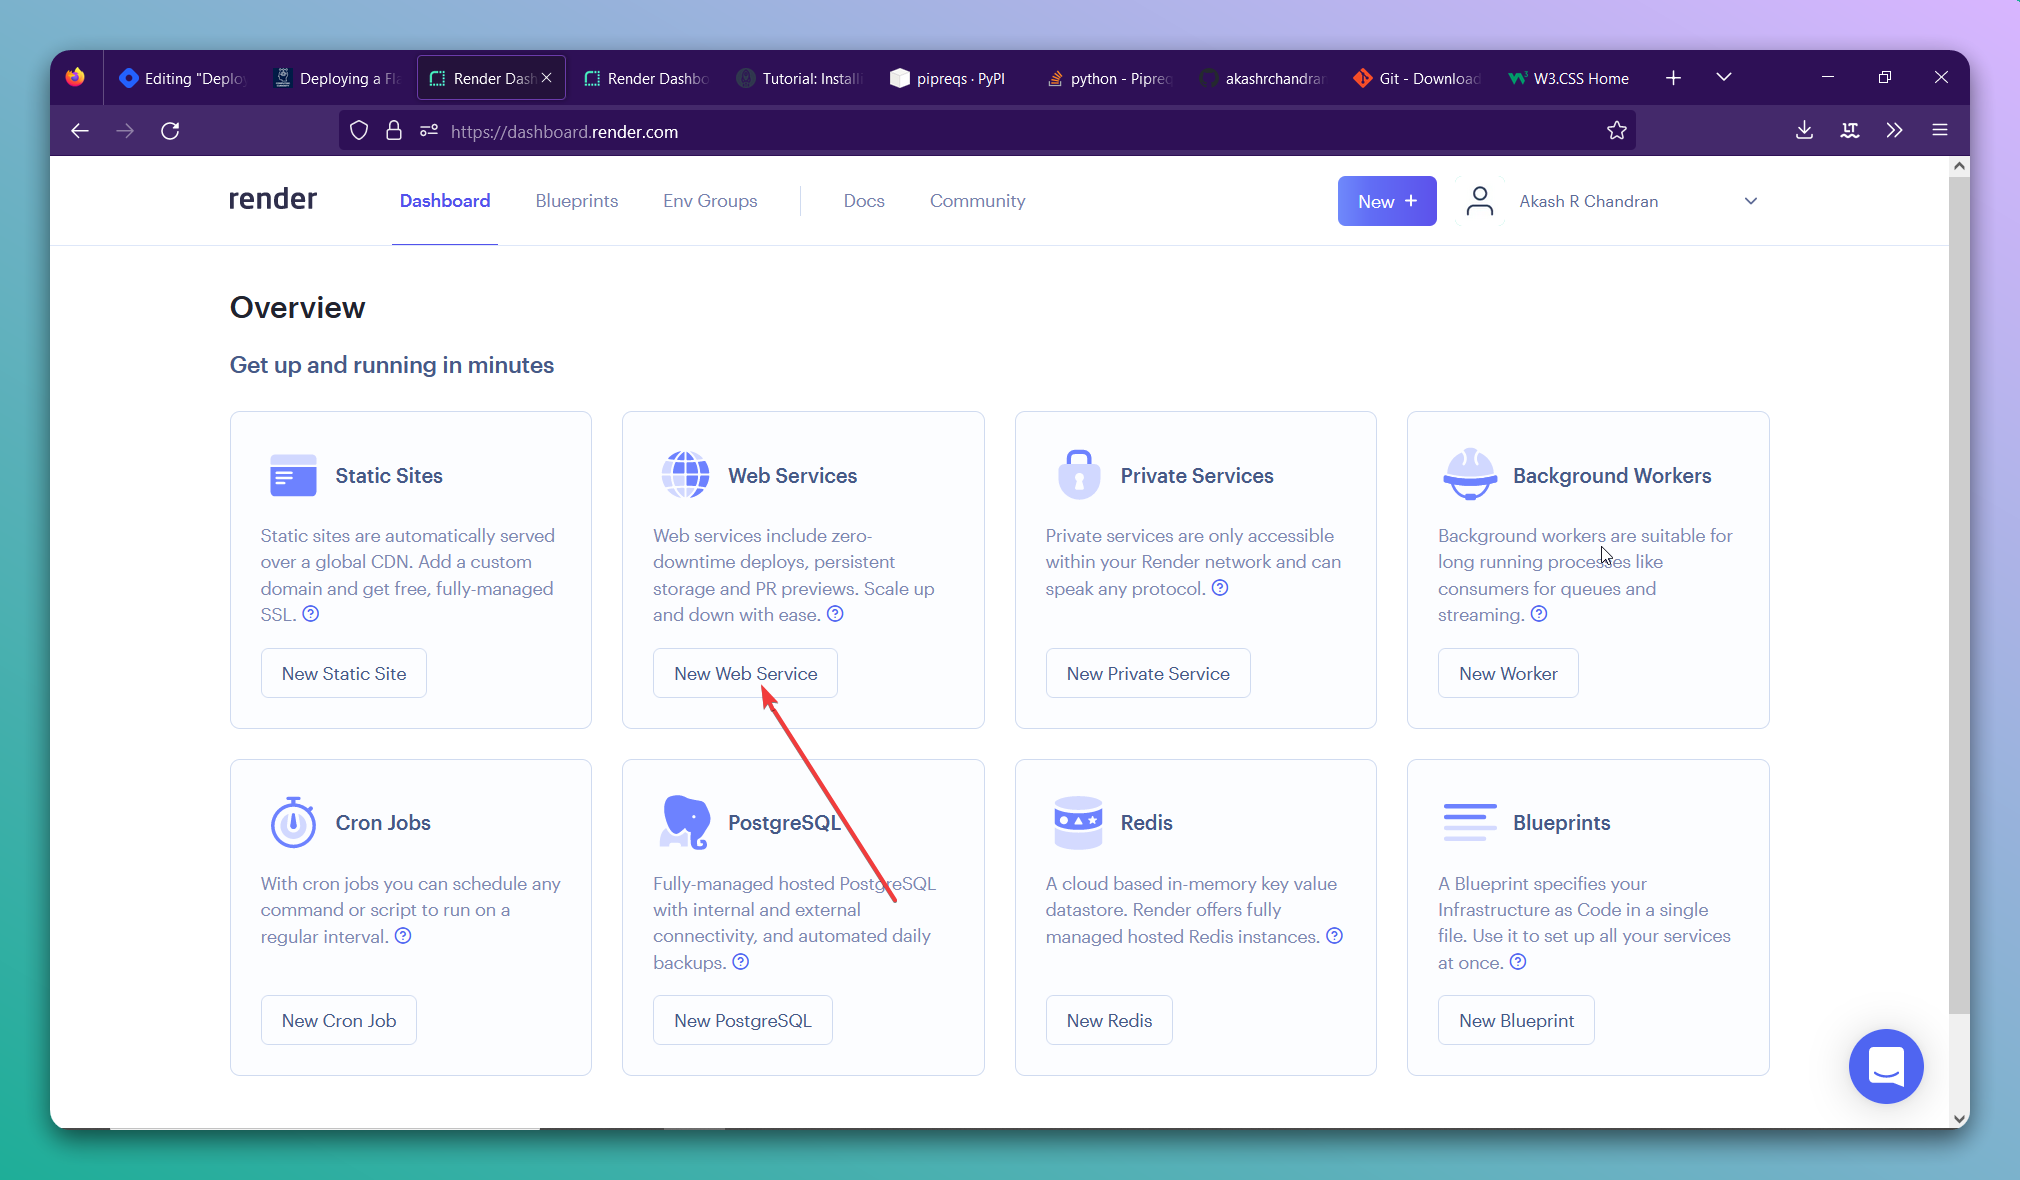
As we are not deploying a static site, we should choose the option Web Service.
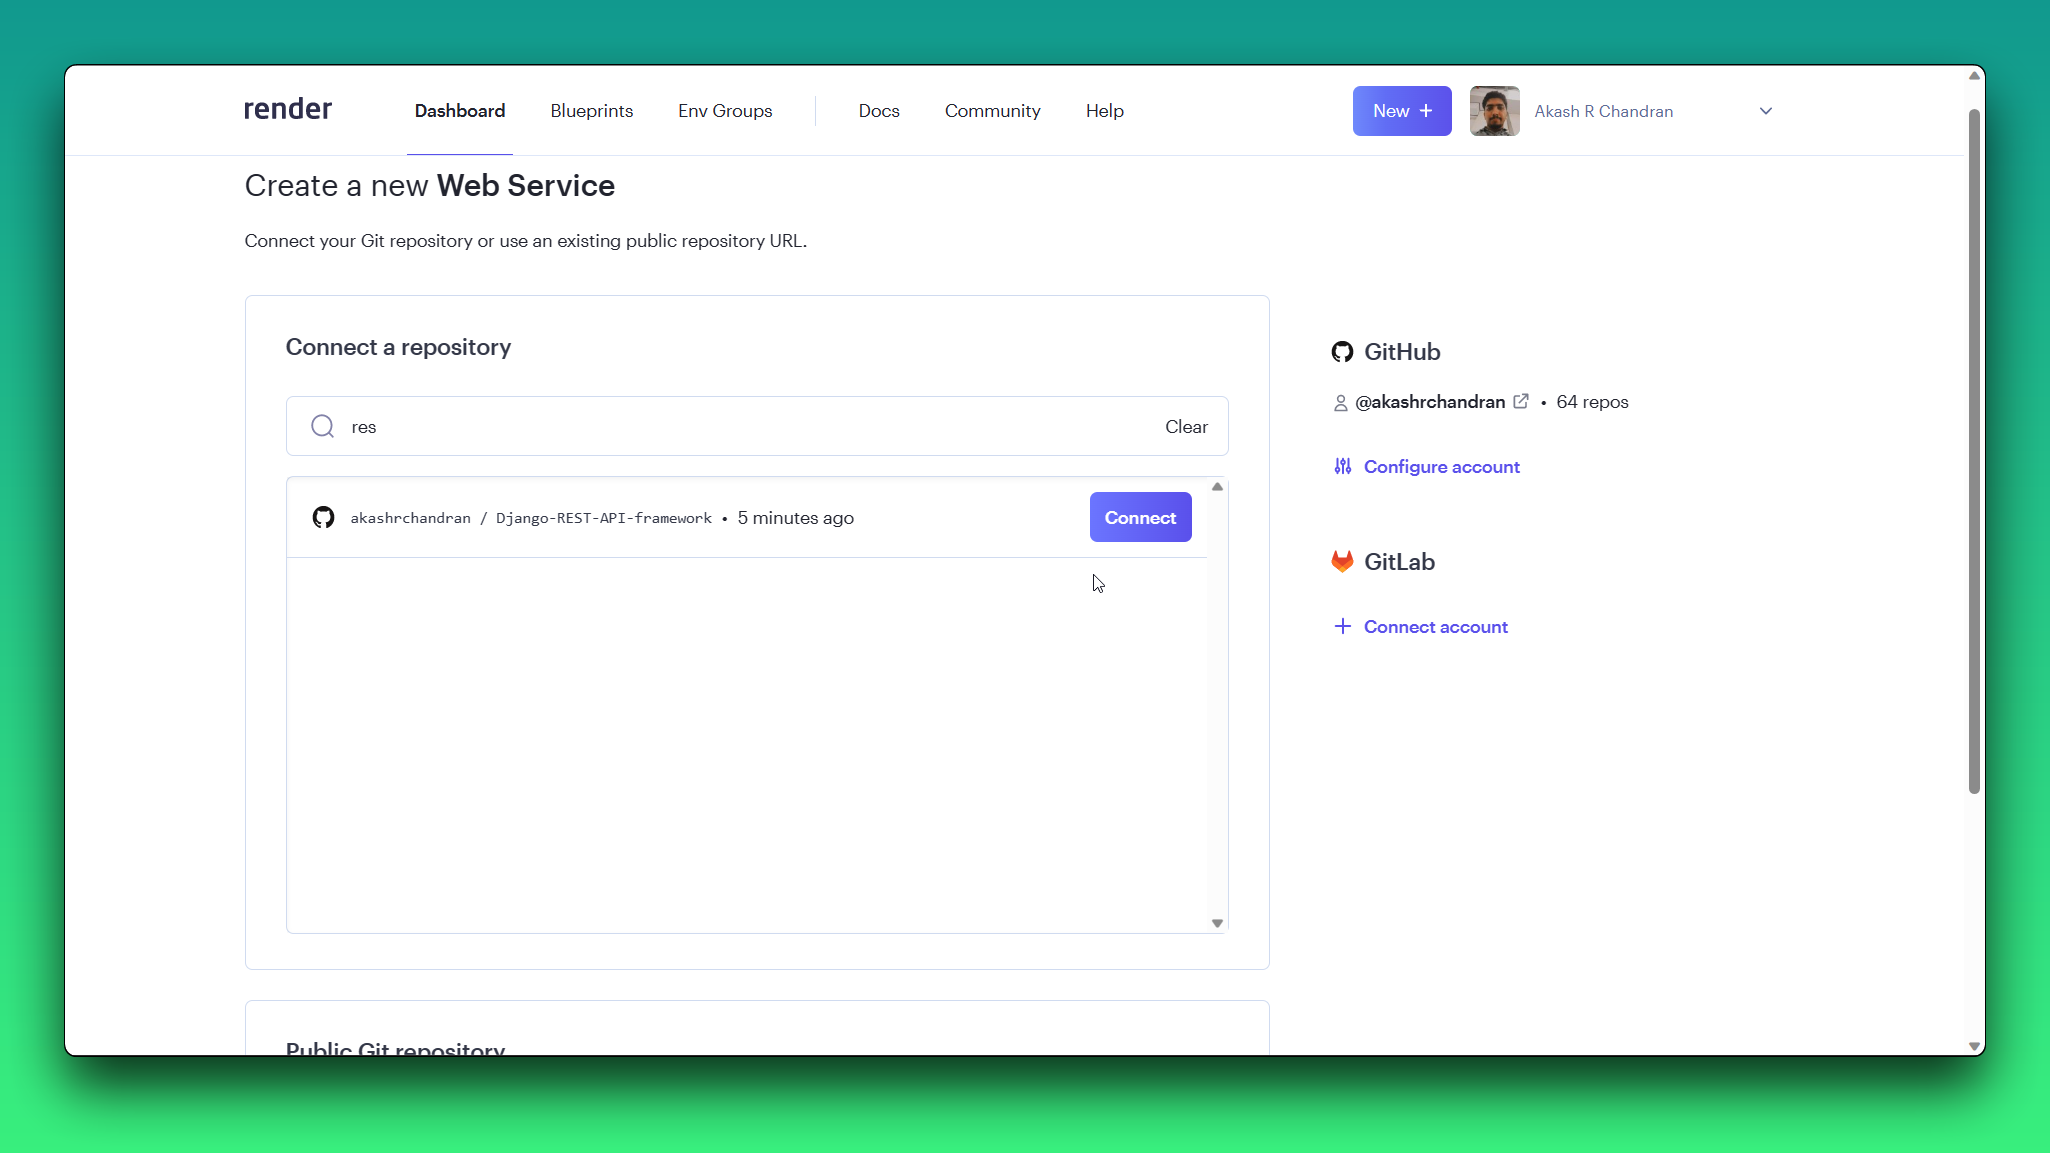
If you have connected your GitHub account, then you can just search the repository name and find it there.
Give a name to your web service, then select the region which is nearest to you, for me in Singapore. Leave all other values default. For the Build command, copy and paste the below:
./build.sh
For the Start command, copy and paste the below:
gunicorn django_rest_trial.wsgi:application
where django_rest_trial is the name of the Django project. Do change this as per your project name.
Next, scroll down and click the Advance button and add the environment variables. Here we only require SECRET_KEY. You can also use the generate button which is provided by render. After adding click the Create Web Service button.

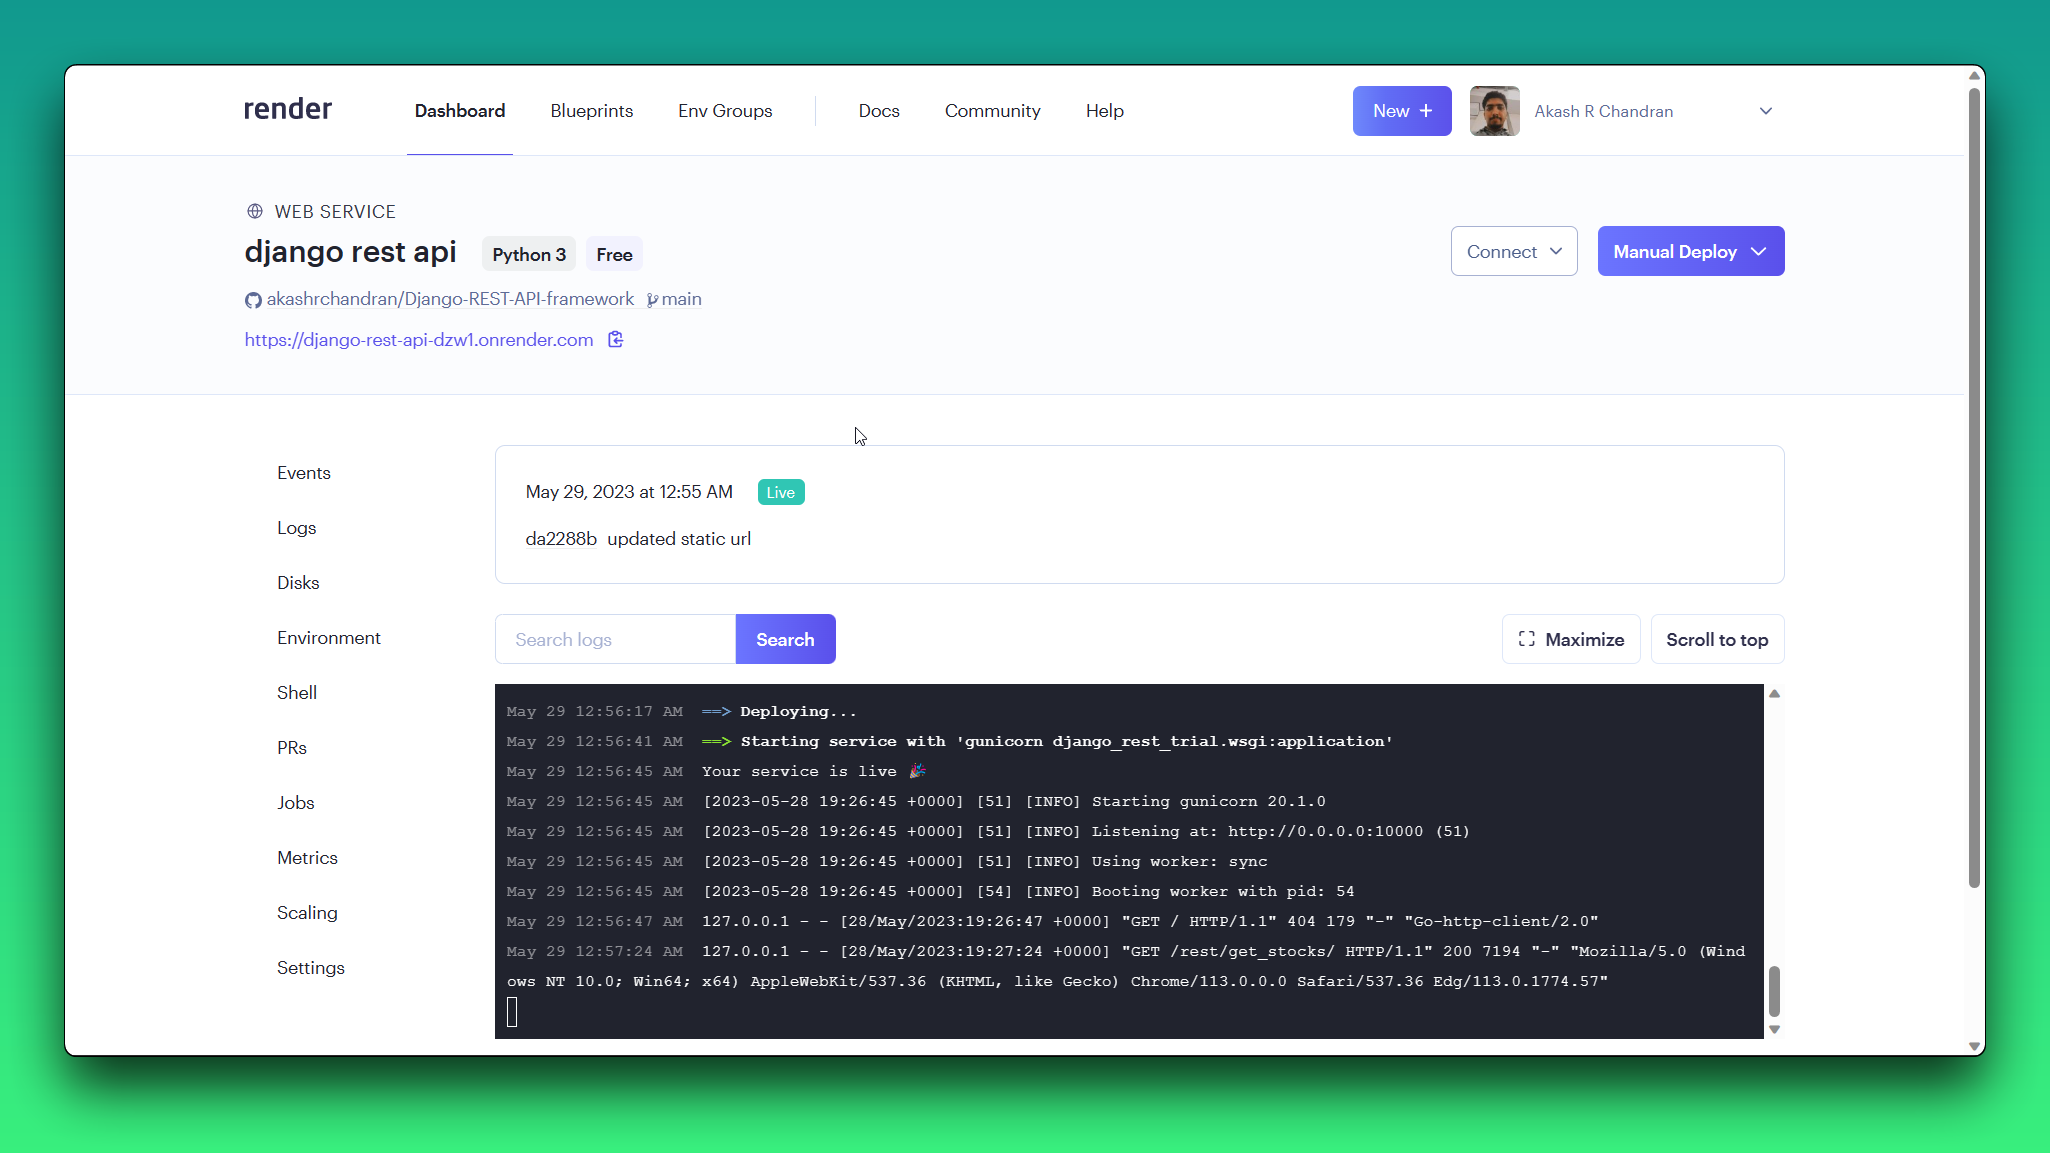
After clicking the button you should see a log with events happening, wait till it finishes deploying.
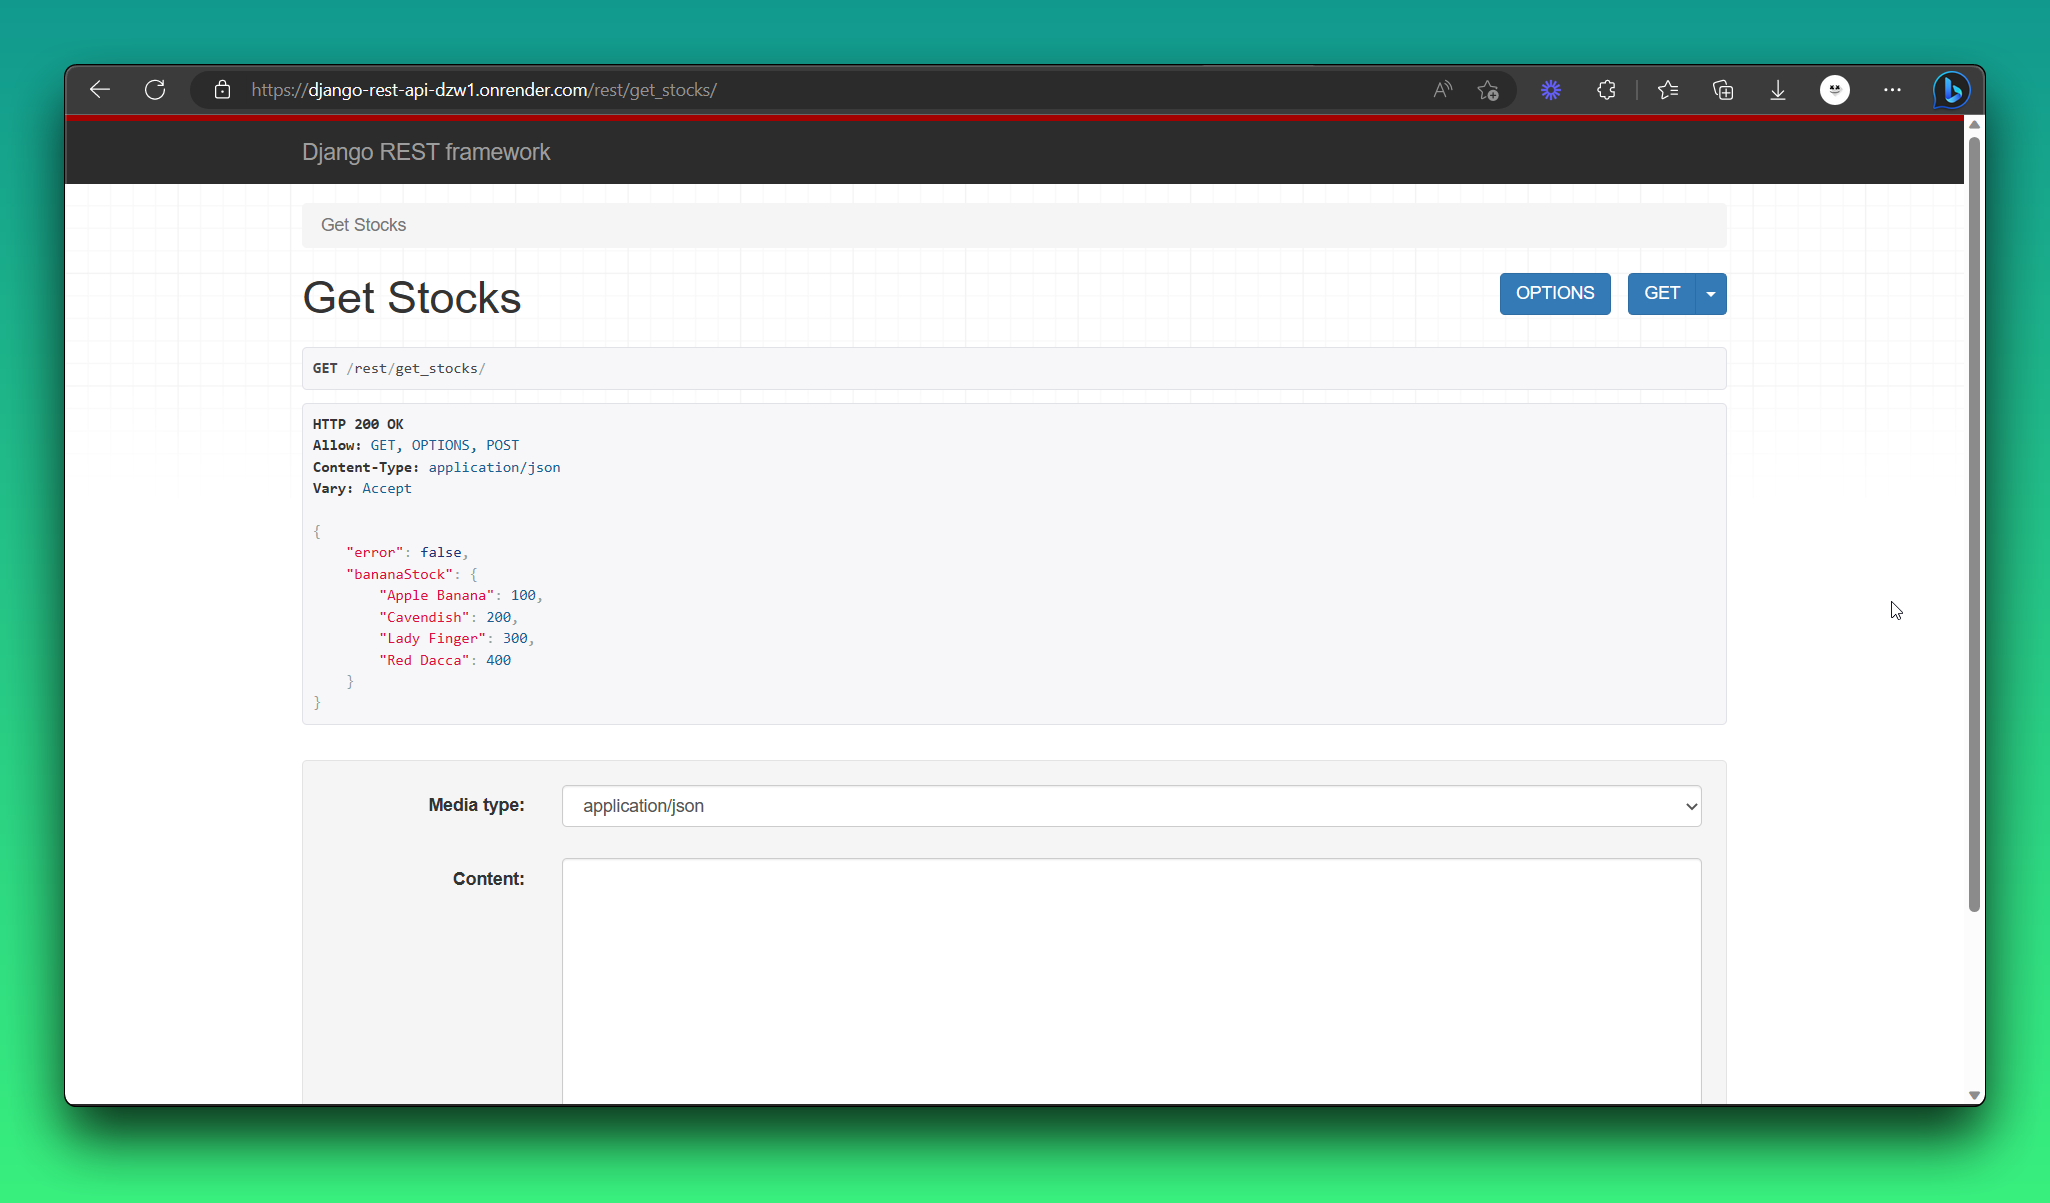
After the site is live visit the route /rest/get_stocks and you should see the API working.
And here we have done it and we have successfully deployed our REST API to render.com. Now sit back and relax by eating as many bananas as you can. The deployed version is available here.
Steve is partying

Thanks for helping Steve to complete his REST API, he is now partying🥳. You can get more information on how to use the Django REST framework to best way read the documentation. There are many alternatives to the Django REST framework, you can give them a try if you want,
They are good alternatives but some hardly maintained any more. Django REST framework is more powerful with authentication and stuff, you can learn about it in the docs.
That's all we have completed the tutorial. Looking forward to meet you in the next one. Meanwhile you can follow me on hashnode and other platforms,
Thanks for reading patiently.